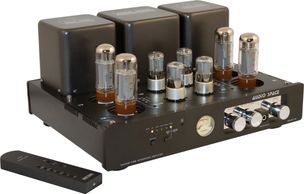
Applicable to Galaxy 34, Galaxy 88, AS-6i (KT88), and AS-6M (KT88)
- Please prepare a “Multi-Meter” (or DC.V Meter), a flat-type screwdriver for bias adjustment use.
- Below is an example of bias adjustment procedures for the AS-6i (KT88) model. Same procedures can be applied to other models that include AS-3i (EL34), AS-6M (KT88), etc.
- Before turning on the amplifier, please ensure all the power tubes (i.e. KT88 in this case) are correctly plugged in the tube sockets of the amplifier.
- Locate the testing pot which has been silk-printed as “Bias ADJ.” on the amplifier cabinet as well as the bias pots [Note: Bias pot “V1″ is for tuning the KT88 tube marked beside the sign “V1 with an arrow” whilst “V2″ pot is for adjusting another KT88 tube marked beside the sign “V2 with an arrow”, and so on].
- Prior to switching on the amplifier, please make sure the cables, including the speaker cables, are correctly connected. Yet, it is necessary to disconnect the signal cable, or alternatively to turn the volume to the lowest position in order to avoid any signal input that would in turn affect the accuracy of bias adjustment.
- Switch your Multi-meter to the DC.V mode. Connect the “N” (i.e. negative testing lead) of the Multi-meter to the pot on the amplifier which is marked with the ” – ” sign whereas the “P” (i.e. positive testing lead) of the Multi-meter should be connected to the pot which is marked with the “+” sign. Since there are totally 4 pcs of KT88 tubes to be adjusted by turns, please select any one of the 4 bias pots (V1 to V4) to start first (e.g. “V1″).
- Now you can turn on the amplifier and let it operates for about 3 minutes before proceeding to the next step.
- To adjust the bias value for the “V1″ tube, connect the “+” testing lead of the Multi-meter (or DC.V. meter) to the “V1″ bias pot and the ” – ” testing lead to ground (* test point cross 10ohm/resistor to ground). Using the screwdriver to adjust the bias until it measures the value at 0.3DCV (i.e. the static current is around 30mA for this vacuum tube). Repeat the same procedures for all other 3 tubes (i.e. V2, V3 and V4) respectively.
- Upon completion of the above steps, repeat Step. 8 after 10 minutes to make sure every bias pot measures the value at 0.3DCV.
- Since bias adjustment involves advanced technical knowledge, should you require any technical assistance, please free feel to contact us.
NOTE: For models like AS-6M(300B)SE, AS-6M(2A3)SE, AS-2i(EL84), AS-2.8i(6V6), MINI-1998SE, MINI-2004 and MINI-GALAXY 1, they are equipped with the function “auto-biasing” and thus no manual bias adjustment is required.


.jpg/:/cr=t:0%25,l:0%25,w:100%25,h:100%25/rs=w:388,h:194,cg:true)


